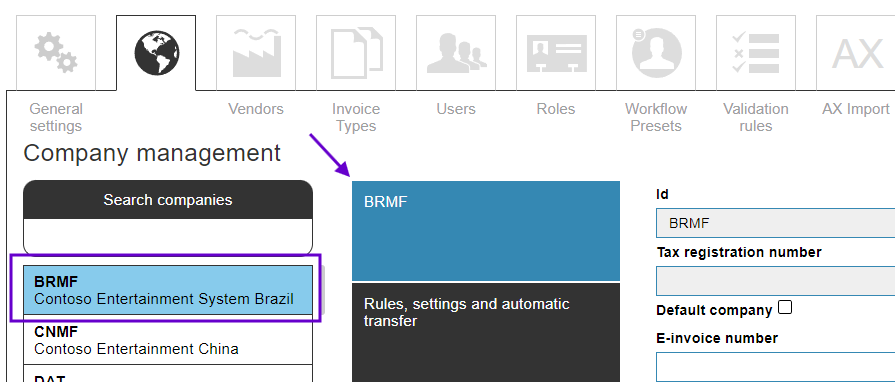
To manage company-level settings, navigate to Admin > Companies. On the left side of the screen, you will see a list of all companies that have been imported from D365/AX2012 into Dooap.
To edit the settings for a specific company, simply select it from the list. The selected company will be highlighted in blue, and its name will be displayed above the settings panel.
The settings are divided into following sections:
- Company management
- Rules, settings and automatic transfer
- Invoice types
- Approval
- Vendor parameters.
Company Management
In the first settings section, you can edit general company-level settings.
- Company ID, Name, Tax registration number, and VAT number: Each of them are imported from D365/AX2012. These settings cannot be changed in Dooap, which is why the fields are displayed in grey.
- Default company: Default company for incoming invoices. If a company is not recognized upon import, the default company will reflect on the invoice (this can always be changed when handling the invoice).
- Not Active: This setting marks a company as inactive. Inactive companies cannot be selected for invoices.
- E-invoice number: Identification number for e-invoices. The system will assign company and vendor on the invoice header based on embedded data on the e-invoice.
- Default role: Default role added to newly imported users.
- Coding validation rule: You can assign a default coding validation rule to the company after coding validation rules are created in the Validation Rules tab.
- Invoice header validation rule: Choose which invoice header validation rule will be used for this company (bank account, method of payment, and reference number are those which can be chosen to be mandatory - if any of these is missing, contact us via email support@dooap.com).
Rules, settings and automatic transfer
In this section, it is possible to edit settings related to following subjects.
-
Delegation: Select whether you want to allow a delegate to perform all the workflow tasks (review & approve) in the workflow.
-
Automatic transfer: You can have Automatic Transfer To Payment (Auto TTP) turned on or off per company.
-
If you wish to enable Auto TTP for an individual invoice, you can select Auto transfer active while handling the invoice. If the column is not visible, please select it from the settings wheel.

-
-
Delegation: You can exclude the selected company from delegation.
-
Maching Learning: Select whether you want to turn on ML for coding or sales tax prediction.
-
Payment Reference Number check: Enable payment reference number check for vendor groups (EU clients only).
-
Wait for Product Receipt: Specify how long after the invoice date the invoice should remain in the "Waiting for PR" status if the PR is missing. See full article here.
- To activate this feature, please contact Dooap via email dooap@support.com.
- Import settings:
- Validate bank account from XML – when this option is enabled, Dooap compares the bank account on the invoice's XML file and the bank account(s) in the Master data. Please contact Dooap support via email dooap@support.com to enable the feature.
- Enable due date from XML – when this option is enabled, the system will disregard the due date specified in the invoice's XML file. When disabled, the due date will be calculated based on the payment term in the vendor master data.
- Use vendor default currency – when this option is enabled, the system will disregard the currency specified in the invoice's XML file and apply the vendor's default currency instead.
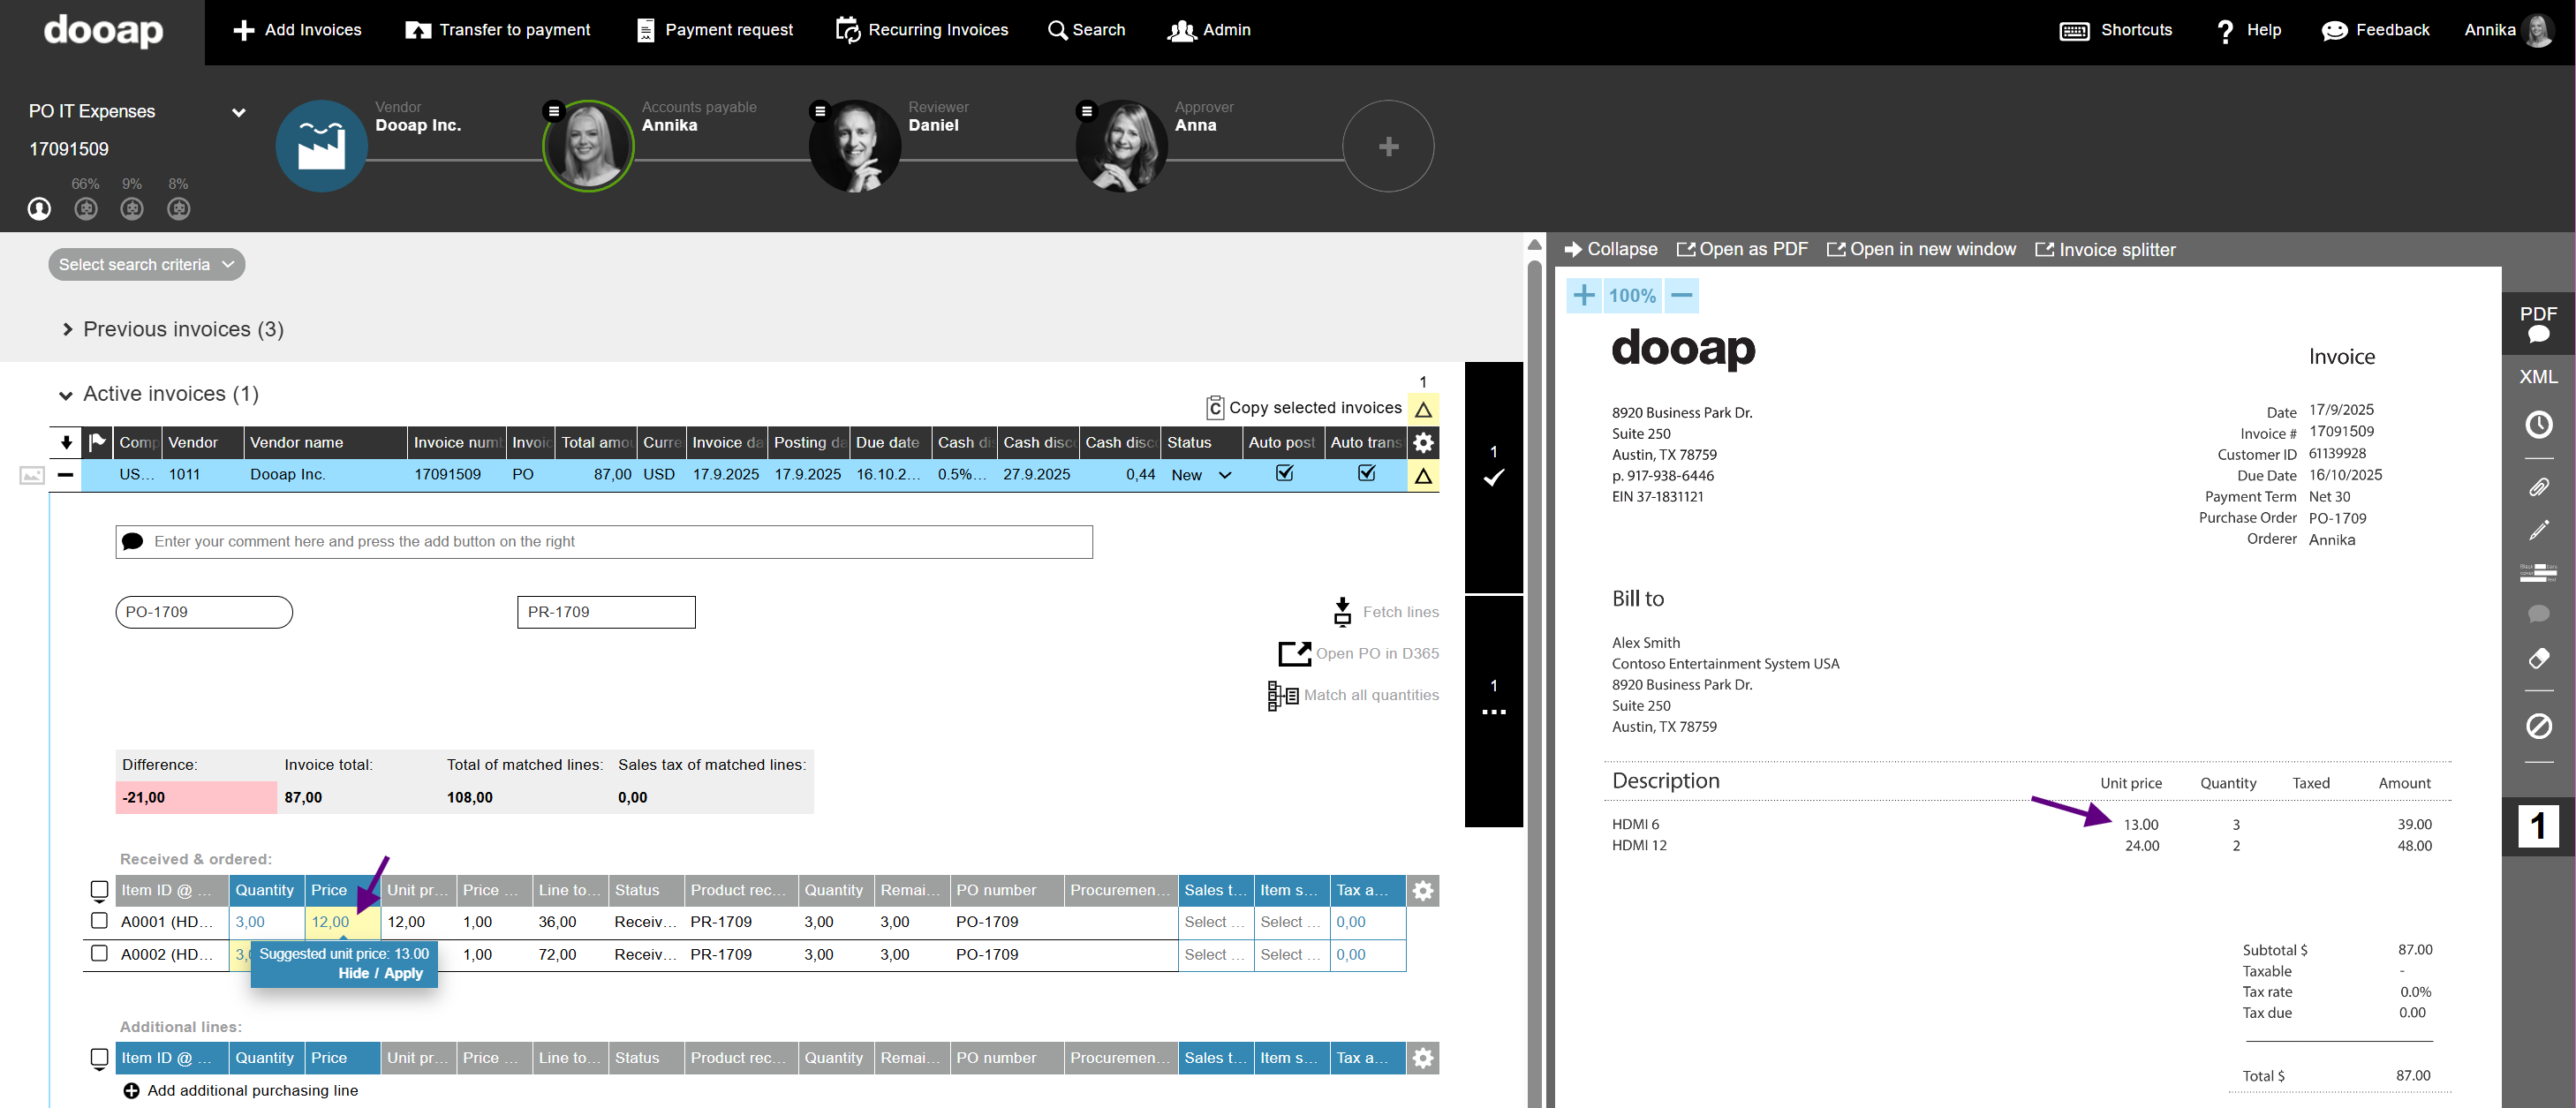
- PO matching suggestions:
-
When PO matching suggestions are enabled, Dooap compares the invoice lines with the corresponding PO lines.
- If there are differences in quantity or price, the system provides AI-driven suggestions to make matching invoices with POs easier.
-

-
-
Once enabled, two additional settings will appear:
-
-
-
-
PO Row Matching – Define the minimum confidence score required for row-level PO matching.
-
PO Unit Price Matching Tolerance – Define the allowed tolerance for differences in unit price.
-
- Example: the invoice line shows a unit price of 13.00, while the corresponding PO line shows 12.00. Dooap suggests updating the PO line to 13.00 to ensure they match, and the change can be applied with a single click on ‘Apply’.
-
Invoice types
In this section, you can manage invoice types and configurations related to each type.
- Create an invoice type and make the configurations.
- Add the invoice type to the company by clicking Add invoice type to company.
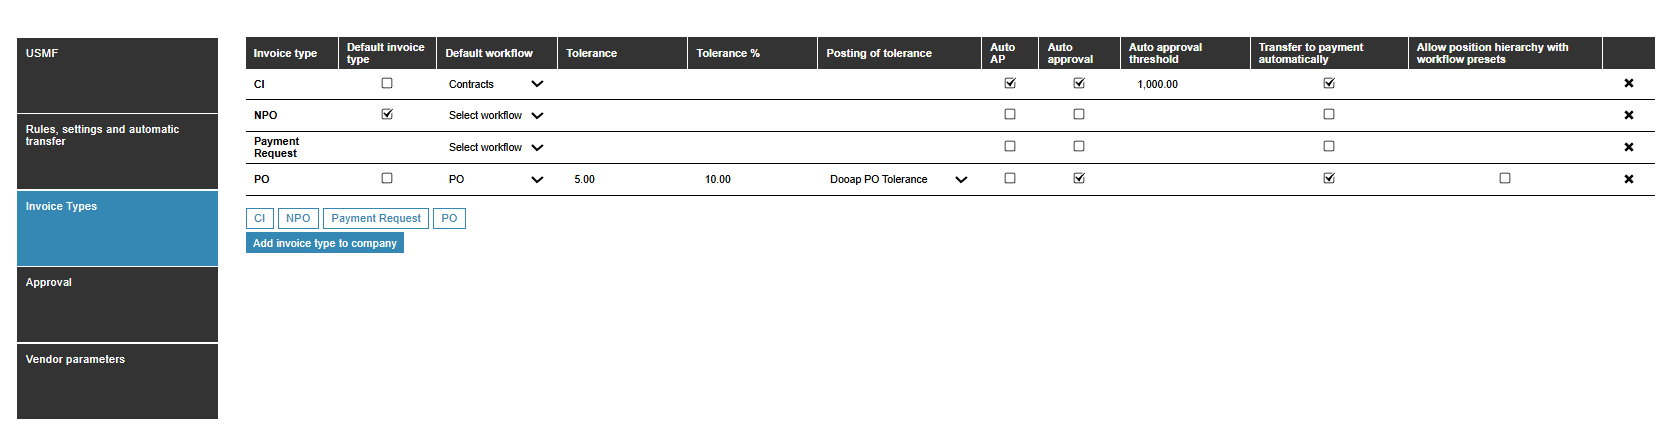
- Invoice type: Name of the invoice type.
- Default invoice type: Select a default invoice type for the company. Imported invoices will automatically be assigned to the default invoice type.
- Default workflow: Select a default workflow for each invoice type. Upon invoice import, the system will automatically assign the default workflow chosen for the company.
- Tolerance and Tolerance %: For PO invoices, you can determine a tolerance amount and tolerance percentage as well as a tolerance posting charge type (i.e. PO Tolerance Rounding, etc). These settings have an influence on PO matching.
- Posting of tolerance: Choose which default charge code will be used for posting tolerance
- Auto AP: This function enables the invoice to skip the initial AP step, and be sent directly to workflow, provided that the below checks are run and no abnormalities are found.
- Auto approval: To have PO invoices that are within tolerance auto-approved, check the box next to PO and/or PO Credit invoices. PO invoices outside of tolerance (or that have Unit Price changes) will route through the full workflow for approval.
- Transfer to Payment Automatically: Select this box to indicate which invoice type you want to have transferred automatically. Auto Transfer header box will automatically be selected. It can be removed manually on the invoice handling page or on the TTP page if needed.
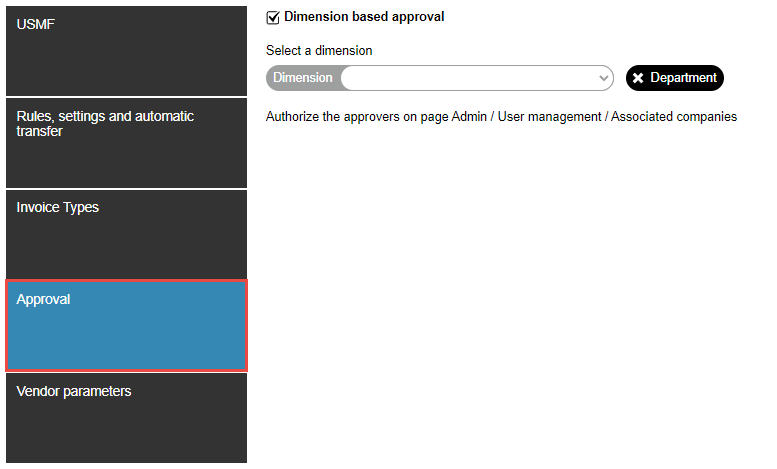
- Dimension based approval: To turn on Dimension Based Approval for this invoice type.
- X: Here you can remove invoice type from the company.
Approval
In this section it is possible to configure Dimension Based Approval. Learn more here.
Vendor parameters
No features available yet.