1. Grant App Registration consents
- You will receive a link from the Dooap Team to authorize login to the Dooap application.
Note: Production has its own authorization link, which will be provided separately.
- Use this link to complete the consent wizard.
- The user completing and approving the consent must be a Global Administrator.
- The Global Administrator’s account must be a native user in the same Azure AD tenant where the D365 environment is hosted.
- Follow the steps in the wizard all the way through until you are prompted to log out.
2. Promote Dooap Package to D365 Production
-
No new package is provided for D365 Production.
-
Promote the same deployable package that was installed in UAT.
3. Optional: Set up ClientID + secret value
Dooap allows using ClientID + Secret authentication layer in addition to the standard username + password method. This optional authentication layer does not affect functionality.
Integration users (UAT + PROD) are still required.
-
Create an Application and Secret in Entra ID (Azure AD) by following Microsoft’s documentation.
-
Link the application to D365FO.
-
Provide the Application (client) ID, secret value, and secret expiration date to the Dooap Team securely.
- More detailed instructions can be found here: D365 Enroll with ClientID & Secret.
4. Grant D365 access to Dooap integration accounts
-
Add both Dooap integration accounts to D365 PROD environment.
- Disable UAT integration user in the D365 PROD environment.
- Grant roles to both integration accounts:
- Dooap
- Dooap parameters
- Dooap integration
- Ensure access to all legal entities in D365, including those outside the Dooap processing scope — access must not be restricted.
5. Grant D365 access to Dooap consultants
Consultant accounts are required for implementation and ongoing support. You can provide access in one of two ways:
- Invite Dooap consultants ( @dooap.com ) as guest users to your Entra ID tenant (preferred).
- Create consultant accounts under your own domain ( @customer.onmicrosoft.com ).
After the accounts exist:
-
Add the user to D365.
-
Assign the following roles:
-
Dooap
-
Dooap parameters
-
If permitted by your internal policies, the System administrator role will be used during the implementation phase.
6. Assign a worker to the integration account
A designated D365 worker (employee record) is required for auto-approval of invoice journals created by Dooap.
Step 1 — Create a Worker
Create a new worker in:
Human Resources > Workers > Workers
Use the following guidelines:
-
Name: Any descriptive name (e.g., “Dooap”)
-
Personnel Number: Any available number
-
Employment Start Date: Today’s date
Step 2 — Link the Worker to the Integration Account
Navigate to:
System administration > Users
Then:
-
Search for the Dooap PROD Integration User and select it.
-
Add the newly created Dooap Worker in the Person field.
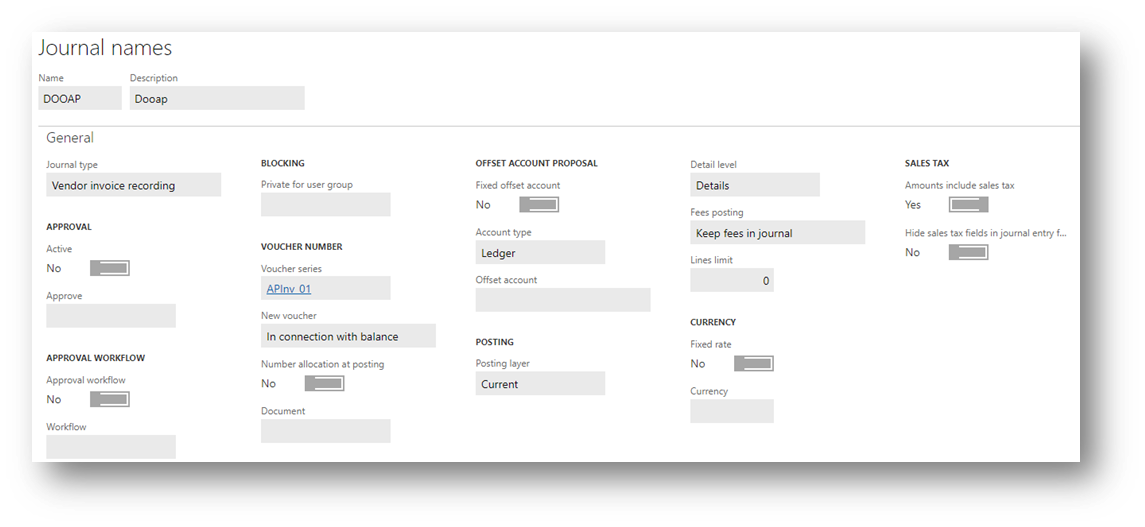
7. Create a new invoice journal
Dooap uses a specific journal to post all Non-PO invoices.
Add this journal to each legal entity using Dooap.
- General Ledger > Journal Setup > Journal names
- Name: Dooap
- Description: Dooap
- Journal type: Vendor invoice recording
- Voucher series: Continuous and company-specific, for example your existing AP Invoice number series
- Amounts include sales tax: Yes
8. Whitelisting
If your environment has access restrictions, please whitelist the Netherlands region, as our global management platform is hosted in Azure West Europe (backup France).
D365 UAT data refresh
When you refresh your D365 data from PROD to UAT, users rights will also be overwritten, which will break the Dooap integration in UAT.
Pre-emptively adding UAT user to the PROD environment in disabled state allows you to restore the functionality by simply re-enabling the UAT integration account after the refresh.
See the more detailed instructions here.