The article outlines the necessary setup for Dooap user accounts to ensure smooth integration and support for users, detailing requirements for different types of accounts and their specific configurations. In order to have a smooth UAT refresh from production, review the following best practices for the D365 user setup.
Requirements for Dooap User Account Setup
The following user accounts should be set up for the integration and support Dooap users:
Production Integration Account: dooapservicePROD@customer.onmicrosoft.com
UAT Integration Account: dooapserviceUAT@customer.onmicrosoft.com
Support Account (Prod/UAT): dooapsupport@customer.onmicrosoft.com
Dooap Guest Accounts
Account Configuration Requirements:
- Integration accounts must have Multi-Factor Authentication (MFA) disabled and passwords set to never expire.
- Both Production and UAT integration accounts must be configured to production.
- This includes worker setup (instructions below), correct roles, and if applicable, Entra Application ClientID.
- The UAT Integration account should be disabled in the production environment.
- It can be enabled for UAT refreshes when necessary by simply toggling the account statuses in the D365 Test environment.
Integration User Worker Setup
Integration user accounts require a worker profile (=employee) linked to the account in D365 to auto-approve journals created by Dooap.
-
Navigate to Human Resources > Workers
-
Create a new worker.
-
Enter a name (For example “Dooap Integration”) and worker number freely. No other changes are required.
-
Hire the worker.
-
Navigate to System Administration > Users, and find the integration user.
-
Link the worker to the Dooap integration user account.
Create an integration worker for both UAT and Production user accounts and assign accordingly. This makes UAT maintenance more manageable.
Tasks after UAT refresh
Integration based on Integration User Account
After the data copy has been completed, make sure you have the user dooapservicePROD disabled and the user dooapserviceUAT enabled in the UAT environment. Make also sure that the user account has a worker attached.
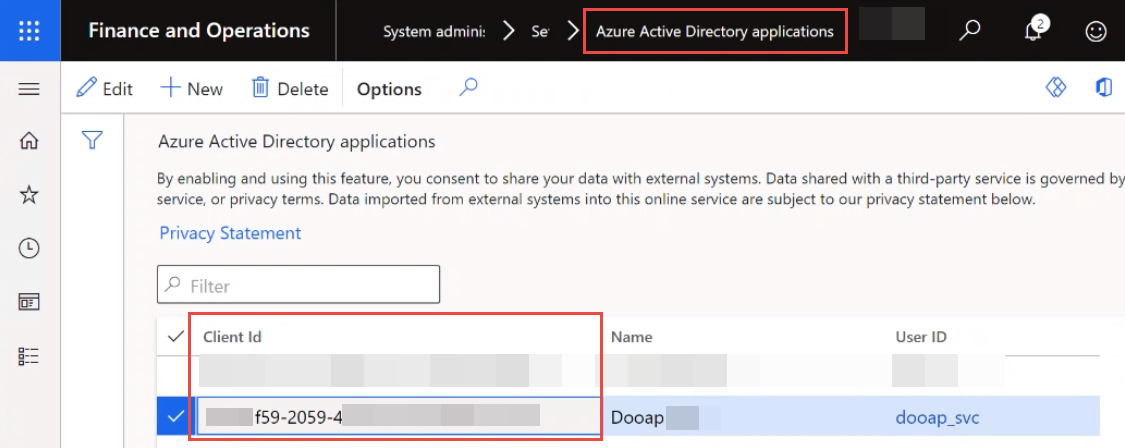
Integration based on ClientID and Secret
After the data copy has been completed, navigate to Entra ID (Azure active directory) applications and change the Dooap User's Client Id to be correct for UAT environment.
Dooap UAT Refresh
Please contact Dooap Support (support@dooap.com) to request a manaul refresh of your Dooap UAT environment.