Adding users is done in D365/AX2012. All enabled users will automatically be imported to Dooap daily from D365/AX2012 or the import can be done manually in Dooap after adding new users to D365/AX2012.
- Note (from version 1.2.35, February 2026 release): Only enabled users are imported. Disabled users imported to Dooap before this version will not be removed.
- More detailed instructions on how to create users in D365, and how to manually do the import can be found here.
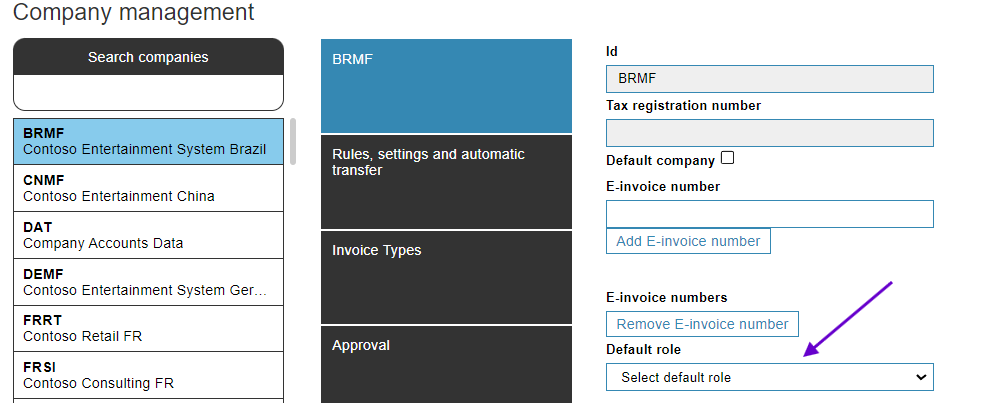
- New imported users will be assigned the company's default user role, if it has been defined in Admin > Companies view.

All imported users can be found and managed in Admin > Users view in Dooap.
Basic User Settings
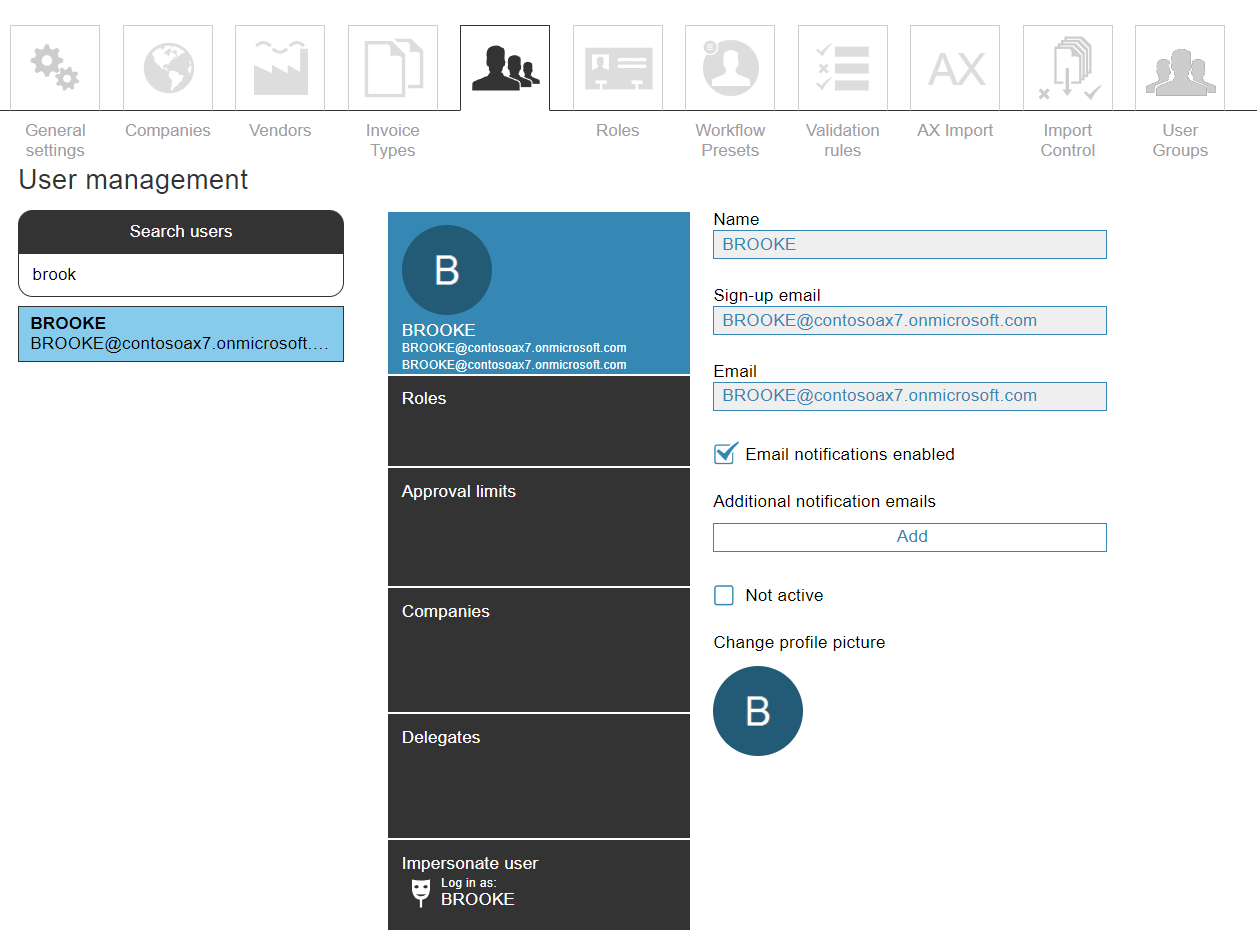
Basic user settings will be displayed first, after selecting a user from the users list.
|
Name & Sign-up email |
They are imported from the master data and cannot be edited. |
|
|
This email address is used for Dooap notifications. If necessary, more email addresses can be added by clicking Additional notification emails > Add. |
|
Not active |
If "Not active" is selected, the user will no longer be able to log in to Dooap and cannot be selected to a workflow. |
|
Change profile picture |
This picture will be displayed in the workflow. Changing the picture can be done by clicking the picture and selecting a new picture from your files. |
Roles
Assigning and removing user roles can be done by selecting Roles.
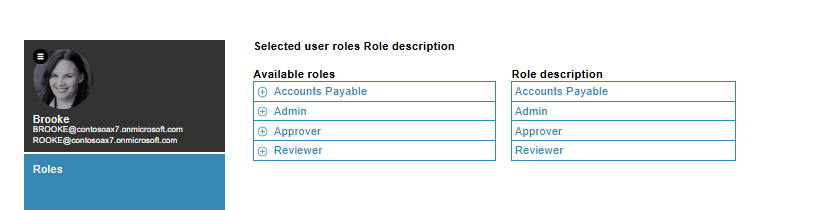
- Assign roles to a user by pressing + button on the Available roles section.
- Remove roles by pressing - button on the Selected user roles section.
User roles can be created and customized in the Roles tab. There, it is possible to manage different permissions that are enabled for a specific role. More detailed instructions on editing user roles can be found here.
Approval Limits
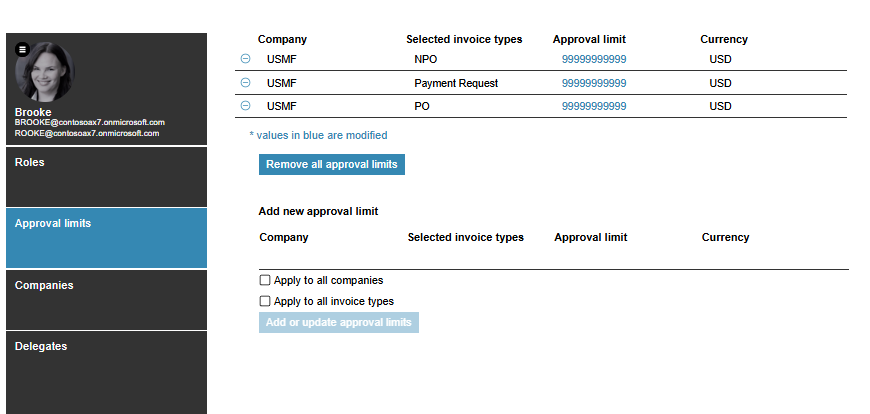
Approval limits can be set by clicking Approval limits. In that view it is possible to set limits by company and by invoice type. Limits must be set for user to be able to approve invoices. If an invoice exceeds the set limit for that company and type, the user cannot be an approver for that specific invoice.
Setting Approval Limits:
- Assign companies: Click Companies tab under Approval limits tab and assign the correct companies for the user by clicking them from the list.
- Companies must be assigned to the user before setting approval limits.
-
Fill in: Company, Selected invoice type, Approval limit, Currency.
- The currency will be converted based on the invoice's currency.
-
Select: If necessary, select All companies and/or All invoice types (this is optional).
-
Click: Add or update approval limits button.
- There will be an approval limit created according to your selections.
- To create a new approval limit, start again from phase 1.
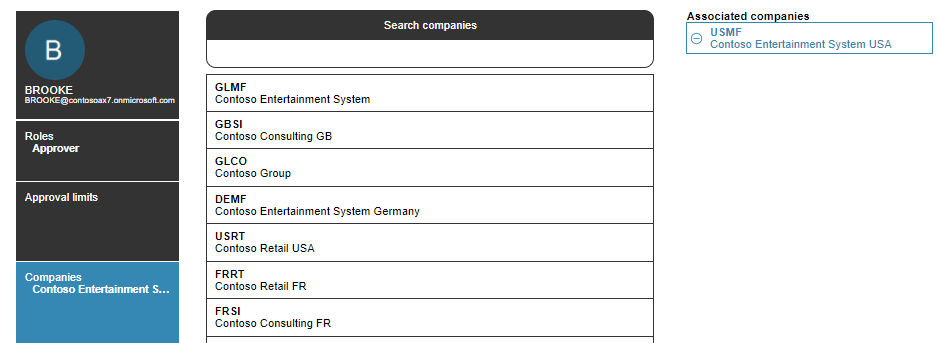
Companies
Navigate to the Companies tab to manage companies to which the user is assigned to.
- Company right will affect invoice visibility for roles such as AP, and the ability to function as a reviewer/approver.
- By default, each user in included in the default company defined for the user in D365.
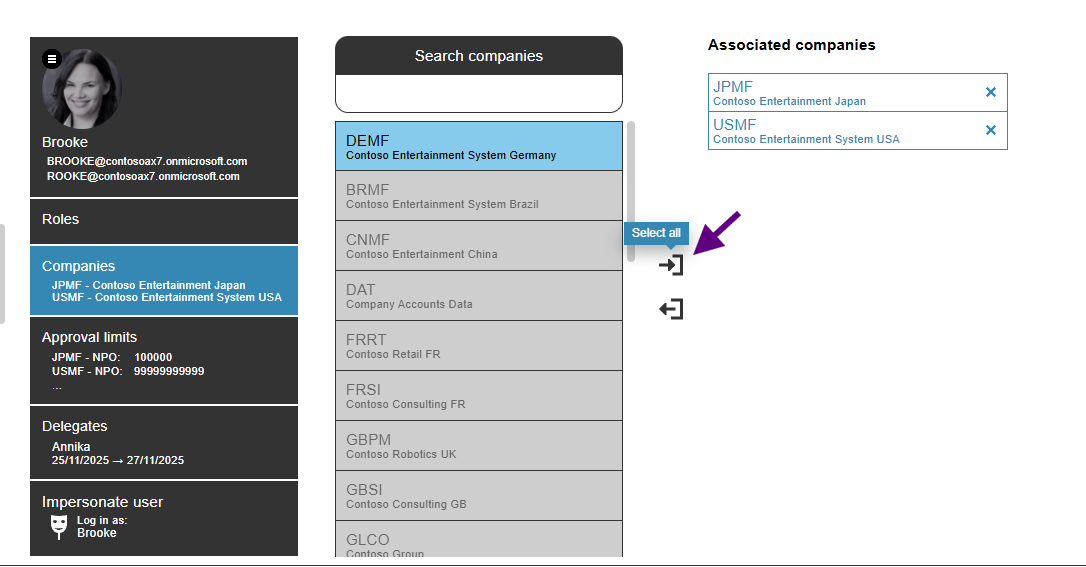
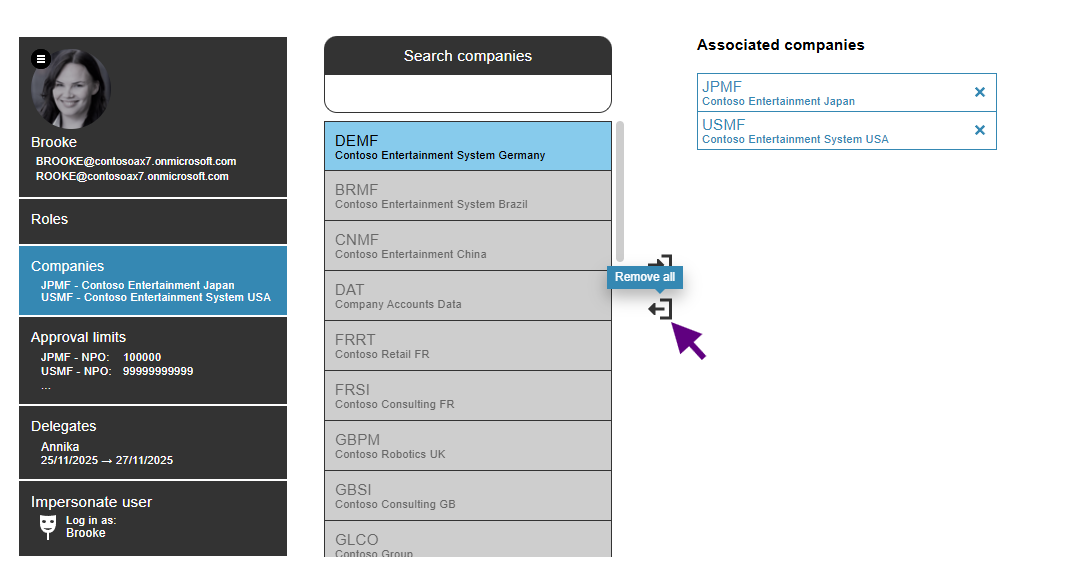
Adding and removing companies
- To add more companies to the user, click on a company's name from the list.
- To remove a company from the user, click the (-) icon next to the company under Associated companies header.
- The default company cannot be removed.
- To add all active companies, click "Select all".

- Companies marked as Not active in Admin → Company management are shown in grey and are automatically excluded when adding all companies.
- If needed, inactive companies can still be added manually by selecting them from the list, for example to view invoices for that company.
- Companies marked as Not active in Admin → Company management are shown in grey and are automatically excluded when adding all companies.
- To remove all assigned companies, click "Remove all".

Delegates
In this section, it is possible to set a delegate (substitute) for the user. Delegation allows the selected user to manage and view the delegator's invoices during the selected period.
- Delegates can be chained.
- All invoice-related user rights are transferred over delegation (viewing, editing, approving) excluding administrative rights.
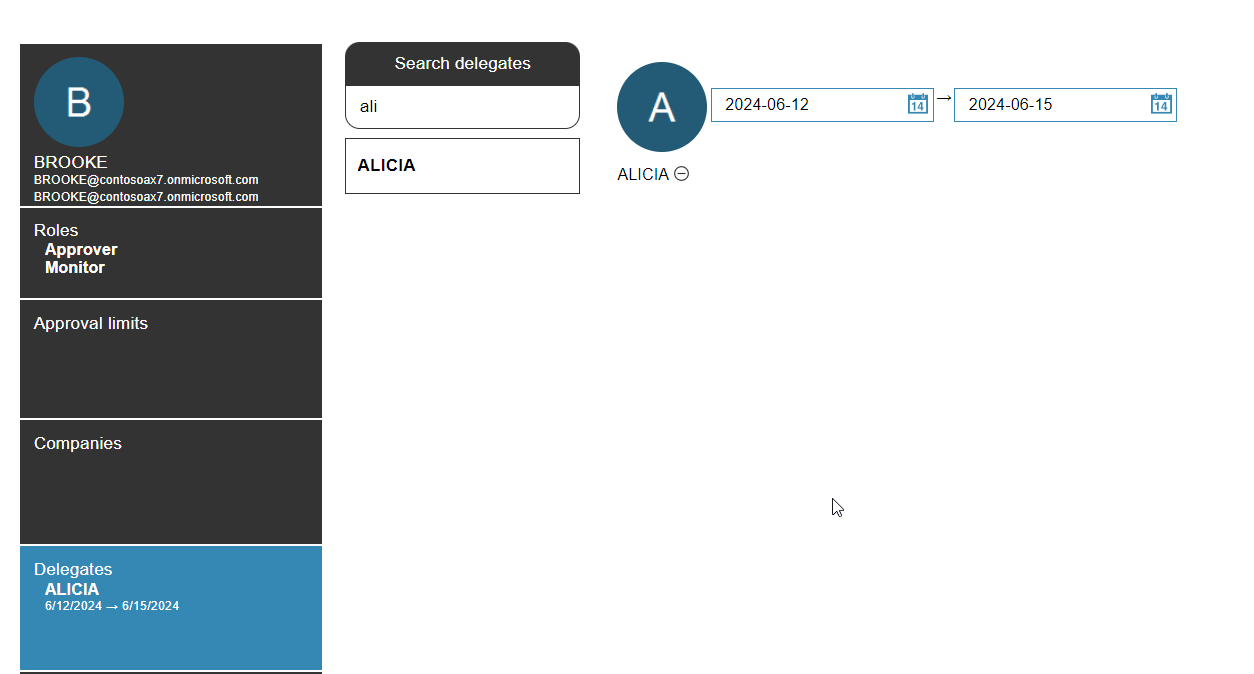
- Select the delegate from the list.
- Edit the dates of the delegation period.
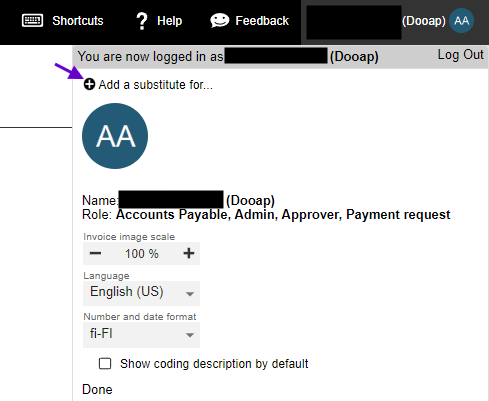
💡The users can set delegates for themselves via the invoice handling page, by clicking their name on the upper right corner and selecting Add substitute for.
Impersonate user
At the bottom of the user management settings, there is a function for impersonating a user. The function enables signing in to another user's account.
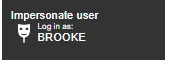
This feature is primarily meant for troubleshooting and testing purposes, for example, to quickly resolve an issue a user has with handling an invoice.
- Clicking Impersonate user (permission required), will log you in as that user.
- To end impersonating, click the name of the user on the upper right corner and click Stop impersonation.

💡The Dooap Power BI report includes detailed information on active delegations, as well as actions performed through delegation or impersonation on behalf of another user. The identity of the actual user performing these actions is always recorded.