Accurate and efficient processing of month-end closing accruals in D365 Finance is crucial for maintaining financial integrity. This guide provides a description for the Fast Close report, as well as step-by-step instructions on setting up D365 journal Excel templates, modifying journal lines, and ensuring proper data upload for seamless month-end closing. Dooap's Power BI Fast Close Report can be utilized as a template in Month-end Closing Accruals.
Important: When setting up the D365 journal Excel templates, it is crucial to carefully follow the instructions for file naming and dimension setup in D365.
Fast Close Report
The Dooap Analytics Power BI offers a report called Fast Close, designed to streamline your month-end accruals. You’ll find it under AP Tools within Dooap Analytics.
The report focuses exclusively on coding lines from invoices that haven’t yet been transferred from Dooap. These include invoices with statuses:
- "New"
- "In Workflow"
- "Approved".
For Ledger PO and Project PO, the report only shows invoices that are 2-way matched.
When selecting a posting date range, keep in mind:
- The earliest date available corresponds to the company's oldest non-transferred invoice in Dooap.
By focusing on untransferred invoices, the Fast Close report gives you a head start on closing the books.
Processing Month-End Closing Accruals
To process month-end closing accruals, you can use any General Ledger journal type in D365 Finance.
- Open D365.
- Begin by creating a new journal.
- When using the journal for the first time, it's recommended to manually fill in one line to understand the format of each field when opening the journal in Excel.
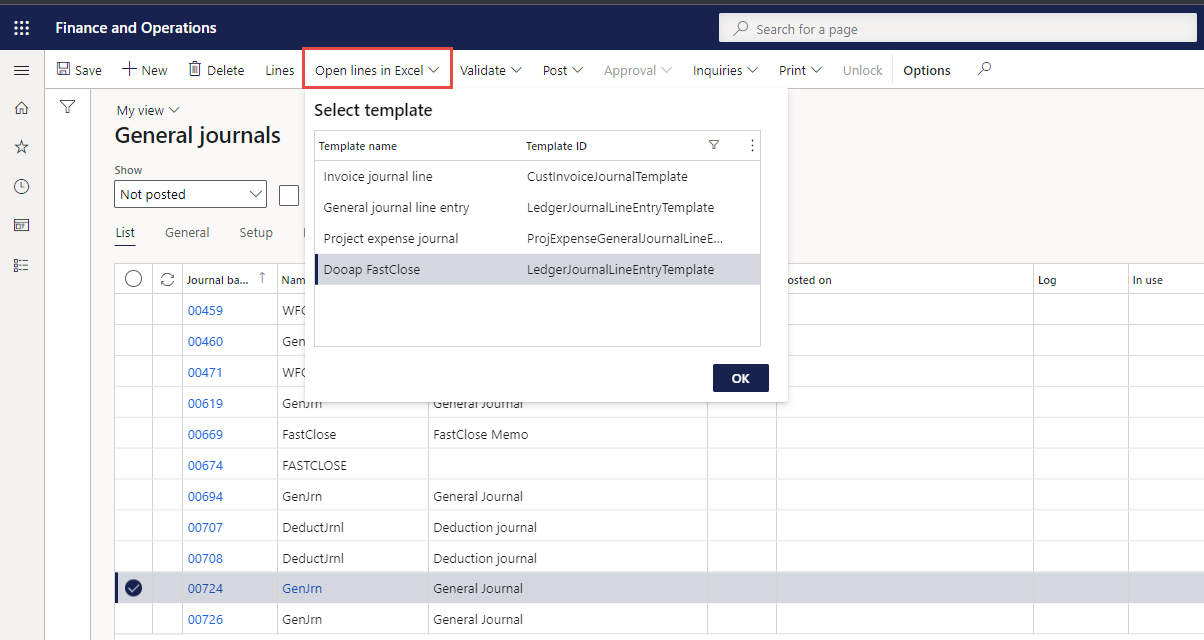
- To modify the journal, select it and click Open lines in Excel.
- In the dialog box, choose the template you want to use.
-
- You can select the Microsoft default "General journal line entry" template or a custom template like "Dooap FastClose".
- New custom templates can be uploaded via Common > Office Integrations > Document templates.
- More information on adding custom templates can be found here.

-
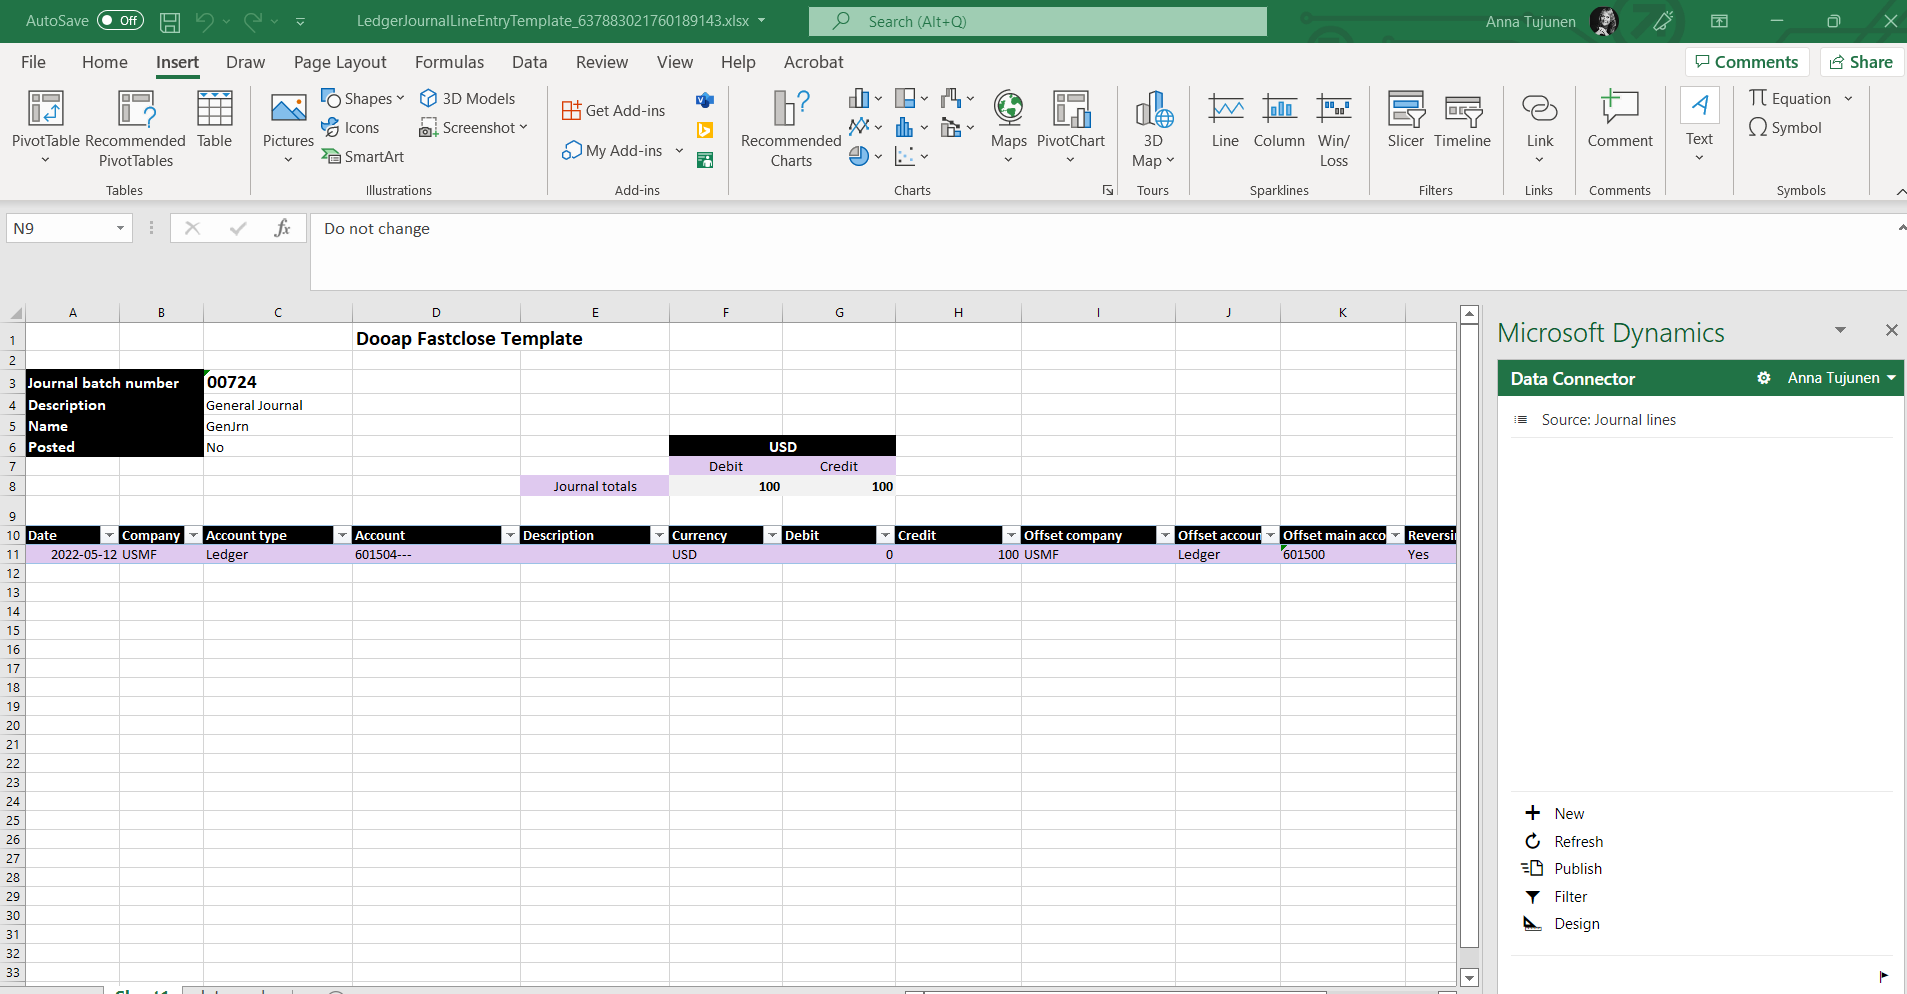
- Open the downloaded Excel document.
- In Excel, click Enable Content to activate the Add-In.
- If this is your first time using the Excel Add-In, you may need to enable it by clicking the Insert tab in the Excel ribbon, selecting "My Add-ins," and then choosing the Microsoft Dynamics Add-In.
- Click Add to open the side panel, which will indicate the connection to D365.
- If prompted, enter your D365 login credentials.

- If this is your first time using the Excel Add-In, you may need to enable it by clicking the Insert tab in the Excel ribbon, selecting "My Add-ins," and then choosing the Microsoft Dynamics Add-In.
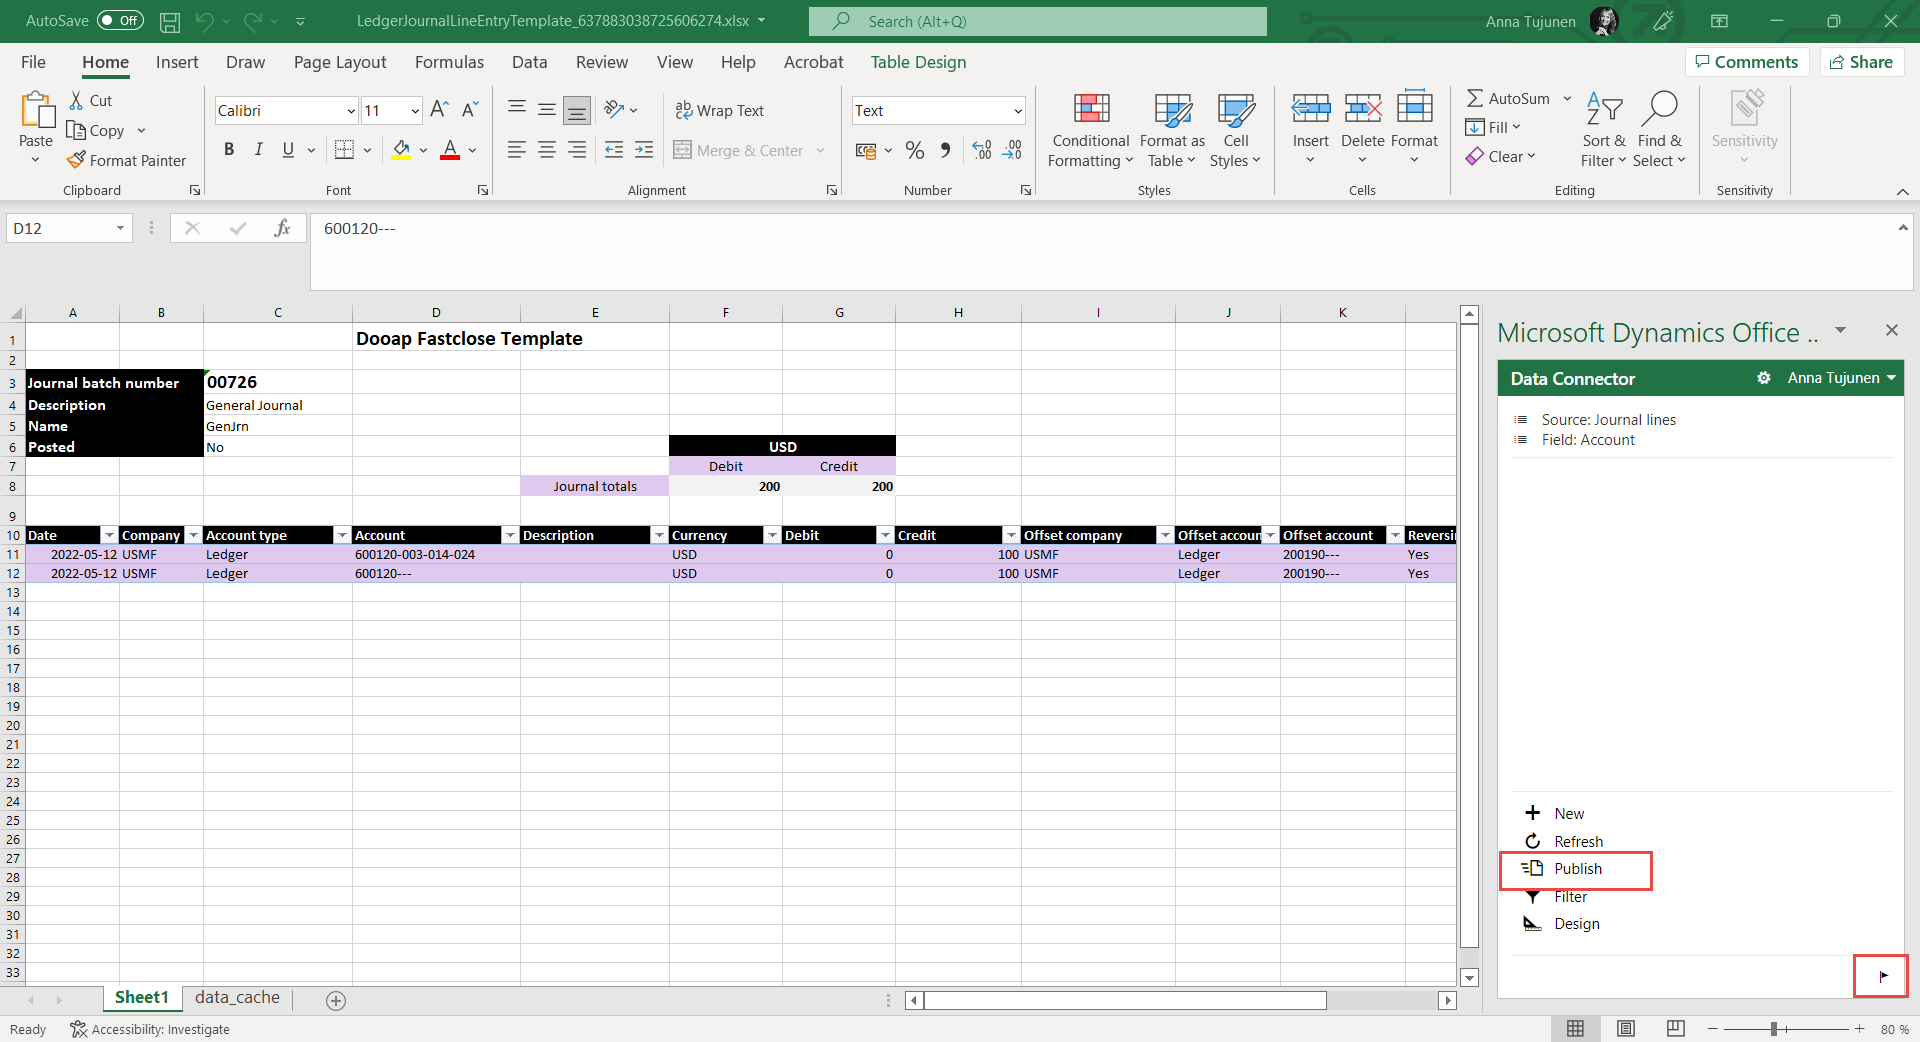
- You can now modify the journal lines.
- Keep in mind that D365 is very strict about the coding format; you must ensure the correct number of values or delimiters are used.
- Do not manually change the "Line Number" field.
- Keep in mind that D365 is very strict about the coding format; you must ensure the correct number of values or delimiters are used.
- To upload the lines to the journal in D365, click Publish in the lower right corner of the D365 Add-In screen.
- Be aware that any lines with errors will be removed during the upload, so it's advisable to save a backup of the lines before publishing to avoid additional work.

- Be aware that any lines with errors will be removed during the upload, so it's advisable to save a backup of the lines before publishing to avoid additional work.
- Any upload errors can be viewed via the flag icon.
- Once the publishing is completed, you can close the Excel file.
- The lines are then visible inside the journal in D365.