Custom Excel Templates and Excel Dimension Structure in D365
How to add custom Excel templates and how to set up the correct dimension structure for Excel templates in D365?
This article assists with creating custom templates in D365 and setting up a dimension structure for Excel templates.
- Custom Templates in D365: Custom templates in D365 Finance allow you to create and use personalized document formats (like Excel templates) for tasks such as journal entries. These templates can be added in addition to the system's default templates, but they need to follow specific naming rules to work alongside the standard ones.
- Dimension Structure for Excel Templates: This refers to setting up the order of financial dimensions (like departments or cost centres) that are used in Excel templates in D365 Finance. Since the Excel Add-in doesn't automatically recognize your account structure, you need to manually define the dimension order to ensure the data aligns correctly.
Custom Templates in D365
Adding custom templates to D365 Finance can be challenging, as the system does not allow multiple templates for the same journal type. However, by following these instructions, you can successfully add an additional custom template alongside the standard one.
Uploading Custom Templates
To upload a new custom template, navigate to Common > Office Integrations > Document Templates.
Key Requirements for Custom Templates
To ensure your custom template appears in D365 Finance alongside the default templates, it's important to follow these specific guidelines:
-
File Name: The file name of your custom template must exactly match the file name of the default template.
-
Report Name: The report name associated with the template must also be identical to the default one.
-
Template Display Name: The only element that can differ is the display name of the template, which is what users will see in the interface.
Avoiding Overriding Default Templates
Due to the system's requirement that file and report names match exactly, there’s a risk of overriding default templates if you need to use them for other General Ledger (GL) journal entries. To avoid this:
- Make your custom template distinct by applying a language, country, or company-specific setting when creating the template.
- This allows D365 to differentiate between templates, ensuring that the default ones remain intact and available for use.
Verifying the Custom Template
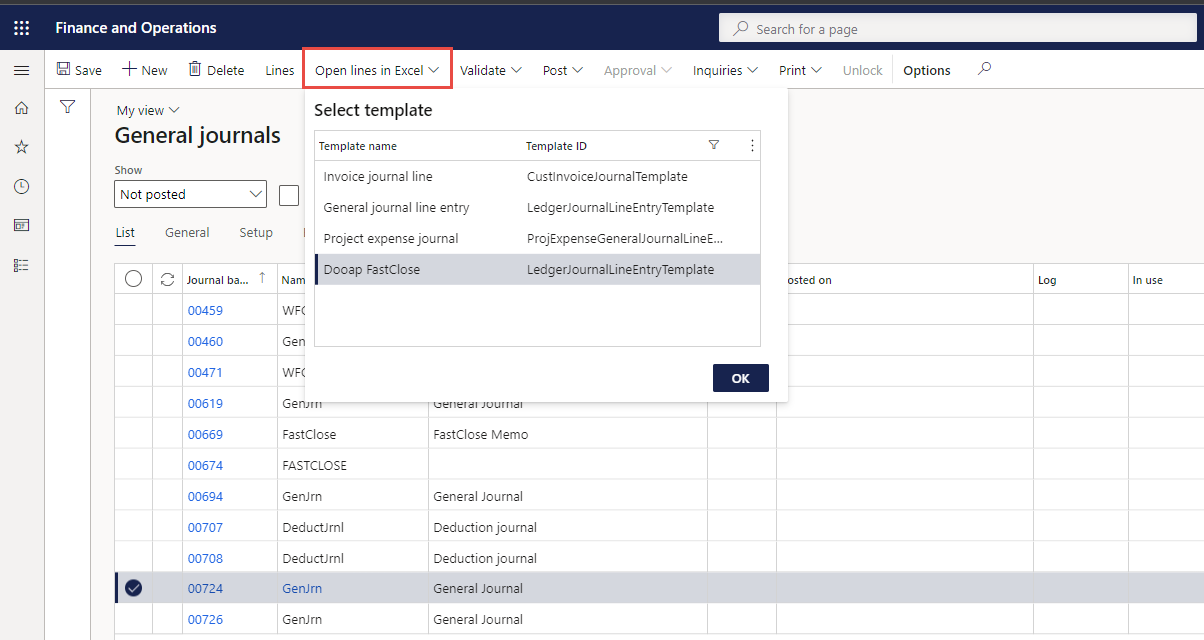
If the steps above are followed correctly, you should be able to view and select the custom template in addition to the default ones.
This can be done when using the "Open lines in Excel" feature on the GL journal form.
Dimension Structure for Excel Templates in D365 Finance
When using the Dynamics 365 Finance Excel Add-in, it’s important to note that the system does not automatically recognize the account structure configurations you’ve set up in D365.
As a result, you must define the dimension order manually within the D365 integration settings.
Defining Dimension Order in D365
To configure the dimension order for Excel templates, follow these steps:
-
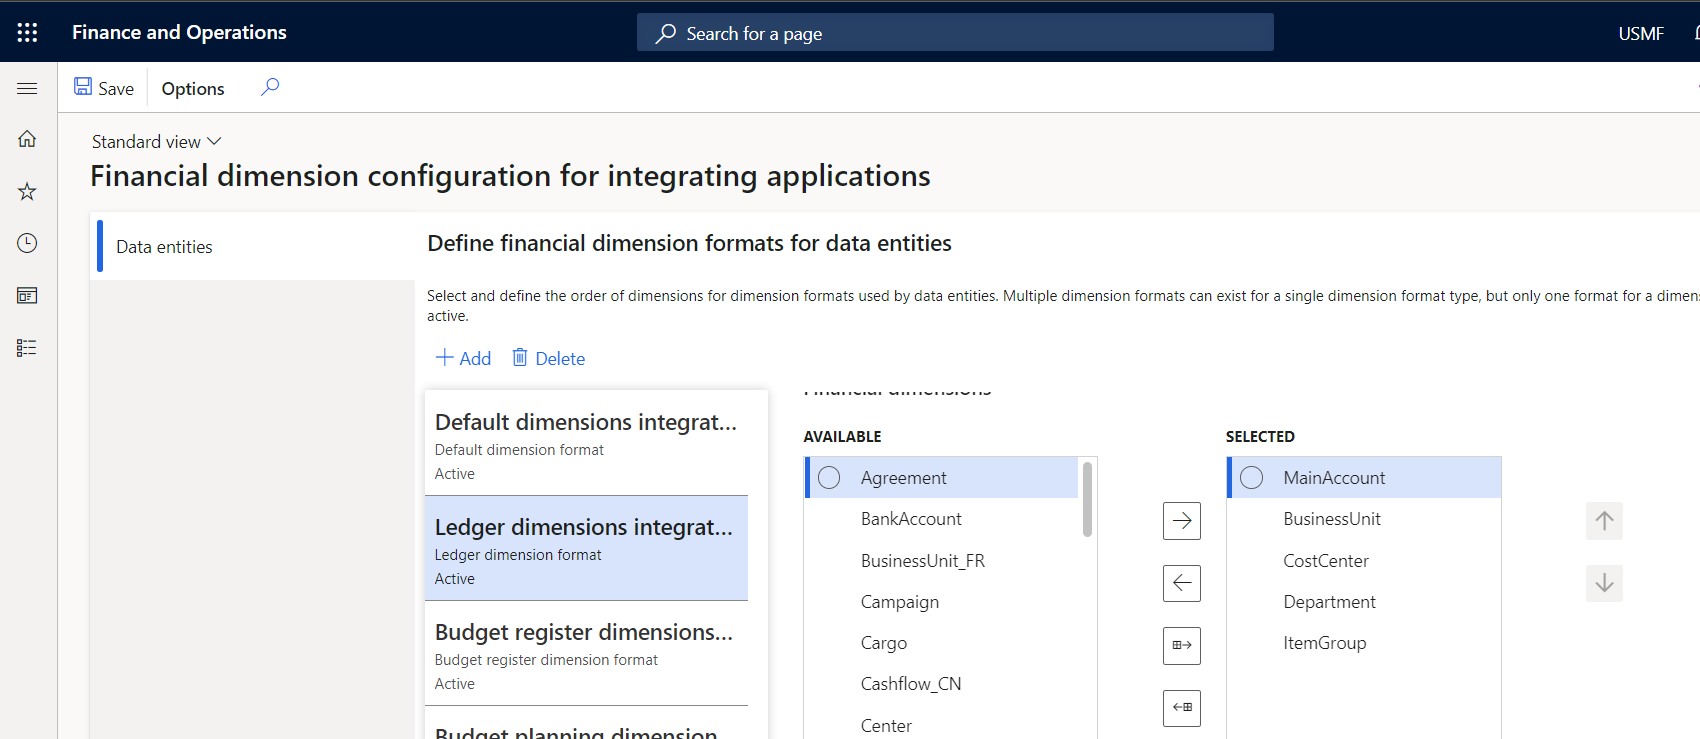
Navigate to General Ledger > Charts of Accounts > Dimensions > Financial Dimension Configuration for Integrating Applications.
-
In this section, you need to specify the dimension order that the Excel Add-in should follow. This setup ensures that the data aligns correctly with your account structures in D365.
Configuring Ledger Dimensions for Accrual Transactions
For Excel lines related to Ledger types, such as accrual transactions, you will need to configure the Ledger Dimensions in the integration setup:
-
Open the Ledger Dimensions integration setup.
-
Select all the necessary dimensions and arrange them in the correct order based on your requirements.
By setting the correct dimension order in the integration setup, you ensure that the Excel templates reflect the correct financial dimensions and structure, making data entry and reporting more accurate in Dynamics 365 Finance.


