In the Admin > Workflow presets view, you can create workflow presets to streamline invoice processing. These presets allow for quicker invoice handling by enabling you to select a previously created preset, without the need to separately select reviewers and approvers.
If needed, the selected preset for an invoice can be adjusted during the invoice handling process.
Step-by-Step Guide: Creating and Editing Workflow Presets
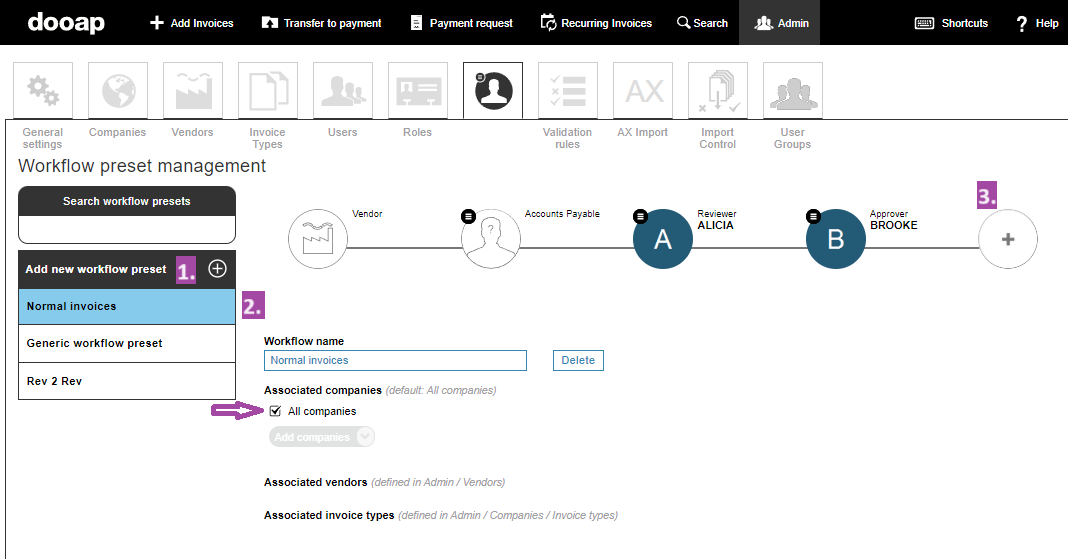
- To add a new workflow preset, click Add new workflow preset (+) on the left.
- An empty workflow will appear on the right.
- Add a name for the workflow to the Workflow name field.
- Add reviewers/approvers to the workflow by clicking the (+) button in the workflow.
- By untapping All companies, you can select separately the associated companies where the workflow can be utilized.
- Multiple companies can be assigned to the same preset.
- When no limitation is set, the workflow preset is visible to all companies.
- Note! Associated companies will limit the available reviewers and approvers for the specific workflow.
- If you want to set associated vendors or invoice types, you can set those in Admin > Vendors and in Admin > Companies > Invoice types.
- Later, if you want to edit a preset, select the correct preset from the list on the left and make the changes.
Deleting a Preset
Deleting a preset is easy:
- Select the correct preset from the list on the left.
- Click Delete next to the workflow name.
- Note: The system will not ask for a confirmation. The preset will be deleted right after clicking Delete.