How can I create a self-billing invoice? What is a payment request invoice type?
Dooap offers a feature that allows authorized users to create self-billing invoices, known as Payment Requests. They are proceed through the normal invoice approval workflow. Payment Requests are always created as Non-PO (NPO) invoices. This functionality is particularly useful for processing internal expense reports or making payments in the absence of an invoice.
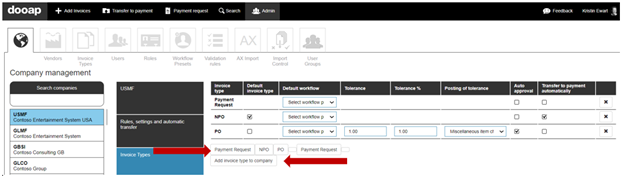
Company Configuration
First, self-billing (payment requests) should be configurated for a company in Dooap.
- Navigate to Admin > Companies > Select a company > Invoice Types.
- Add Payment Request invoice type to the company, by clicking Payment Request and then Add invoice type to company.
- Optional setups:
-
Default workflow
-
Auto approval
-
Transfer to payment automatically.

-
- To remove an invoice type from a company, select the X in the last column of the invoice type row.
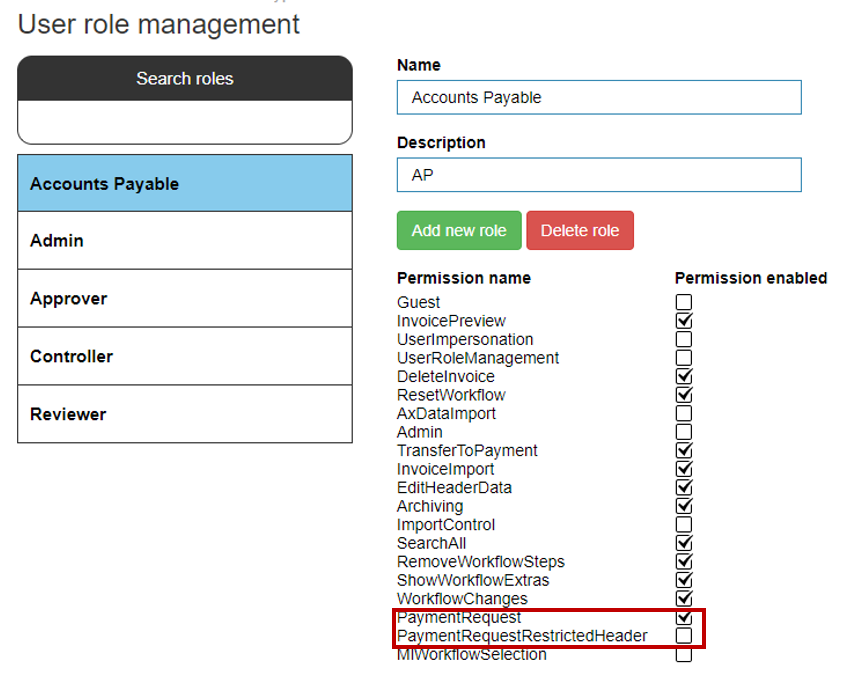
User Role Permission Configuration
After the company settings, the configuration should be made per user role. There are two different payment request permissions available: one with full edit rights and the other with restricted edit rights.
Add the appropriate permission to each user role according to how you want them to create payment requests.
- PaymentRequest
- This grants users the ability to create payment requests with the right to add/edit invoice header information, including Bank Account, Method of Payment, and Payment Terms. even if it defaults from the vendor.
- PaymentRequestRestrictedHeader
- This grants users the ability to create payment requests with restricted rights to add/edit invoice header information.
- The user is unable to edit Bank Account, Method of Payment, and Payment Terms even if it does not default from the vendor.
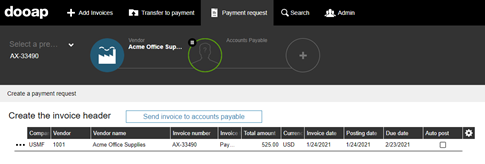
Creating a Payment Request
- Click Payment request in the top panel.

- Fill in the header information.
- If vendor defaults are assigned, those will auto populate once the vendor has been added.
- Add an attachment (mandatory).
- Select a workflow (optional).
- You can either select a preset from the drop-down menu, a machine learning suggestion, or use position hierarchy.
- If workflow defaults are set, the workflow will automatically appear.
- Click Send invoice to accounts payable.
- An NPO invoice will then appear in the Next invoices section for the AP team to handle as they normally would.